

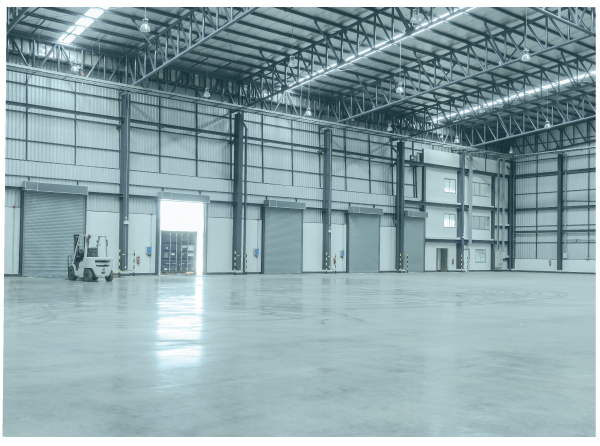
The iShine Floor System is a multi- variation, step by step procedure that was developed by a team of product specialists and engineers to ensure the maximum quality shine and finish for your job, if followed accordingly.
The different procedural variations make it suitable for different job sizes, finish options and budgets.
We won’t lie, Floor Systems can be quite technical and complex, which often is a turn off for many. That’s why Bartell Global decided to approach the concept of Floor Systems a little differently. We want our customers to achieve the maximum quality finish without the potential headache that floor systems can cause. Because it was designed with contractors in mind, we have strived to create a system that is straight-forward and easy to follow, in effort to alleviate the stress an confusion that tends to come with Grinding and Polishing Floor Systems, without sacrificing quality and efficiency.
We understand that not everyone is looking for the same finish, as well as different people are working within different time and budget constraints, which is why iShine has 4 different finish options. These 4 unique finishes differ in terms of time, cost, and appearance without lacking in quality and efficiency. This makes it easy to choose the job appropriate custom finish, instead of being limited to a “one-size-fits-all” finish option.
The iShine really is a superior solution that contractors and users can trust to give extraordinary results.
THE ISHINE FLOOR SYSTEM FINISH OPTIONS

- Specifically made for jobs that need a quick, easy, and economical polish.
- Best for relatively new slab because this finish doesn’t grind down to the aggregate.
- Starts with a Transitional diamond, and works its way up to 400 grit iShine resin.
- Finished with a Low Gloss Sealer for a flat finish.
THE ECONOMY PROCESS
TRANSITIONAL
![]() Using the quick change TMAG resin adaptors, fasten the transitional tooling to the grinder. Grind in an “east to west” then “north to south” pattern, or until a uniform scratch pattern is achieved. Thoroughly inspect that scratches from previous step have been removed before moving on to the next step.
Using the quick change TMAG resin adaptors, fasten the transitional tooling to the grinder. Grind in an “east to west” then “north to south” pattern, or until a uniform scratch pattern is achieved. Thoroughly inspect that scratches from previous step have been removed before moving on to the next step.
iShine 100
Squeegee or vacuum up dust residue from previous step, proceed to polish with iSHINE100 Grit resin (BLACK). Polish in an “east to ![]() west” then “north to south” pattern, or until a uniform scratch pattern is achieved. Thoroughly inspect that scratches from previous step have been removed before moving on to the next step.
west” then “north to south” pattern, or until a uniform scratch pattern is achieved. Thoroughly inspect that scratches from previous step have been removed before moving on to the next step.
DENSIFIER
![]() Squeegee or vacuum up dust residue from previous step. Ensure that the surface is clean and dry before completing the densification process. For a Sodium based densifier apply ArmorDefend Na. For a Lithium based densifier apply ArmorDefend Li. Refer to the chosen products data sheet for safety and application instructions.
Squeegee or vacuum up dust residue from previous step. Ensure that the surface is clean and dry before completing the densification process. For a Sodium based densifier apply ArmorDefend Na. For a Lithium based densifier apply ArmorDefend Li. Refer to the chosen products data sheet for safety and application instructions.
iShine 200 – iShine 400
![]() After the densification process is complete, proceed with the remaining resin steps. Polish with iSHINE 200 Grit resin (BLUE). Polish in an “east to west” then “north to south” pattern, or until a uniform scratch pattern is achieved. Thoroughly inspect that scratches from previous step have been removed before moving on to the next step. Squeegee or vacuum up dust residue from the previous step if required. Repeat this process for iSHINE 400 grit (RED).
After the densification process is complete, proceed with the remaining resin steps. Polish with iSHINE 200 Grit resin (BLUE). Polish in an “east to west” then “north to south” pattern, or until a uniform scratch pattern is achieved. Thoroughly inspect that scratches from previous step have been removed before moving on to the next step. Squeegee or vacuum up dust residue from the previous step if required. Repeat this process for iSHINE 400 grit (RED).
LOW GLOSS SEALER
![]() Squeegee or vacuum up dust residue from previous step. Ensure that the surface is clean and dry before completing the ArmorFinish: Stain and wear protection. Refer to the product data sheet for safety and application instructions.
Squeegee or vacuum up dust residue from previous step. Ensure that the surface is clean and dry before completing the ArmorFinish: Stain and wear protection. Refer to the product data sheet for safety and application instructions.

- Made for jobs that are looking for a High Shine, beautifully polished concrete finish but is still time saving and cost effective.
- Best for relatively new slab of concrete because this process doesn’t involve grinding down and exposing aggregate.
- Starts with Transitional Diamond and works its way up to a 1500 grit iShine resin.
- Finished with High Gloss Sealer.
THE PRESTIGE PROCESS
TRANSITIONAL
![]()
Using the quick change TMAG resin adaptors, fasten the transitional tooling to the grinder. Grind in an “east to west” then “north to south” pattern, or until a uniform scratch pattern is achieved. Thoroughly inspect that scratches from previous step have been removed before moving on to the next step.
iShine 100
![]() Squeegee or vacuum up dust residue from previous step, proceed to polish with iSHINE100 Grit resin (BLACK). Polish in an “east to west” then “north to south” pattern, or until a uniform scratch pattern is achieved. Thoroughly inspect that scratches from previous step have been removed before moving on to the next step.
Squeegee or vacuum up dust residue from previous step, proceed to polish with iSHINE100 Grit resin (BLACK). Polish in an “east to west” then “north to south” pattern, or until a uniform scratch pattern is achieved. Thoroughly inspect that scratches from previous step have been removed before moving on to the next step.
DENSIFIER
![]()
Squeegee or vacuum up dust residue from previous step. Ensure that the surface is clean and dry before completing the densification process. For a Sodium based densifier apply ArmorDefend Na. For a Lithium based densifier apply ArmorDefend Li. Refer to the chosen products data sheet for safety and application instructions.
iShine 200 – iShine 1500
![]() After the densification process is complete, proceed with the remaining resin steps. Polish with iSHINE 200 Grit resin (BLUE). Polish in an “east to west” then “north to south” pattern, or until a uniform scratch pattern is achieved. Thoroughly inspect that scratches from previous step have been removed before moving on to the next step. Squeegee or vacuum up dust residue from the previous step if required. Repeat this process for iSHINE 400 grit (RED), iSHINE 800 grit (WHITE) & iSHINE 1500 grit (YELLOW).
After the densification process is complete, proceed with the remaining resin steps. Polish with iSHINE 200 Grit resin (BLUE). Polish in an “east to west” then “north to south” pattern, or until a uniform scratch pattern is achieved. Thoroughly inspect that scratches from previous step have been removed before moving on to the next step. Squeegee or vacuum up dust residue from the previous step if required. Repeat this process for iSHINE 400 grit (RED), iSHINE 800 grit (WHITE) & iSHINE 1500 grit (YELLOW).
HIGH GLOSS SEALER
![]() Squeegee or vacuum up dust residue from previous step. Ensure that the surface is clean and dry before completing the ArmorFinish: Stain and wear protection. Refer to the product data sheet for safety and application instructions.
Squeegee or vacuum up dust residue from previous step. Ensure that the surface is clean and dry before completing the ArmorFinish: Stain and wear protection. Refer to the product data sheet for safety and application instructions.

- Low Gloss finish with Exposed Aggregate.
- Starts with grinding to open up the floor and expose the desired level of aggregate.
- Takes out imperfections in the slab.
- After exposing aggregate, a Transitional is used to begin polishing up to 400 grit.
- Finished with Low Gloss sealer for a flat finish with exposed aggregate.
THE ELITE PROCESS
TMAG 40 – TMAG 80
![]() Assess concrete hardness and determine which type of metal bond diamond would be ideal for your concrete conditions. Example: TMAG X-Soft, Soft, Medium, Hard. Refer to our bond chart for more information. Begin the grinding process using TMAG40; 40 grit metal bond diamonds. Grind in an “east to west” then “north to south” pattern, or until a uniform scratch pattern is achieved. Thoroughly inspect the floor to ensure that the desired level of aggregate and floor flatness is achieved before moving on to the next steps. Squeegee or vacuum up dust residue from previous step. Repeat the same process using TMAG80; 80 grit metal bond diamonds.
Assess concrete hardness and determine which type of metal bond diamond would be ideal for your concrete conditions. Example: TMAG X-Soft, Soft, Medium, Hard. Refer to our bond chart for more information. Begin the grinding process using TMAG40; 40 grit metal bond diamonds. Grind in an “east to west” then “north to south” pattern, or until a uniform scratch pattern is achieved. Thoroughly inspect the floor to ensure that the desired level of aggregate and floor flatness is achieved before moving on to the next steps. Squeegee or vacuum up dust residue from previous step. Repeat the same process using TMAG80; 80 grit metal bond diamonds.
*Note: Due to the unknown nature of the aggregate dispersion in a concrete floor, low exposure aggregate floors will often have an inconsistent end result. As this is usually a result of the concrete pour, it is out of the operators control and as such should be identified to the owner as soon as possible.
TRANSITIONAL
![]()
Using the quick change TMAG resin adaptors, fasten the transitional tooling to the grinder. Grind in an “east to west” then “north to south” pattern, or until a uniform scratch pattern is achieved. Thoroughly inspect that scratches from previous step have been removed before moving on to the next step.
iShine 100
![]()
Squeegee or vacuum up dust residue from previous step, proceed to polish with iSHINE100 Grit resin (BLACK). Polish in an “east to west” then “north to south” pattern, or until a uniform scratch pattern is achieved. Thoroughly inspect that scratches from previous step have been removed before moving on to the next step.
DENSIFIER
![]()
Squeegee or vacuum up dust residue from previous step. Ensure that the surface is clean and dry before completing the densification process. For a Sodium based densifier apply ArmorDefend Na. For a Lithium based densifier apply ArmorDefend Li. Refer to the chosen products data sheet for safety and application instructions.
iShine 200 – iShine 400
![]()
After the densification process is complete, proceed with the remaining resin steps. Polish with iSHINE 200 Grit resin (BLUE). Polish in an “east to west” then “north to south” pattern, or until a uniform scratch pattern is achieved. Thoroughly inspect that scratches from previous step have been removed before moving on to the next step. Squeegee or vacuum up dust residue from the previous step if required. Repeat this process for iSHINE 400 grit (RED).
LOW GLOSS SEALER
![]()
Squeegee or vacuum up dust residue from previous step. Ensure that the surface is clean and dry before completing the ArmorFinish: Stain and wear protection. Refer to the product data sheet for safety and application instructions.

- Full Grind and Polish.
- Start by opening up the floor to expose aggregate, then working each step up to 1500 grit iShine resin.
- Finishes with a High Gloss Sealer for a complete polished, high shine concrete floor.
THE ULTRA-ELITE PROCESS
TMAG 40 – TMAG 80
![]()
X-Soft, Soft, Medium, Hard. Refer to our bond chart for more information. Begin the grinding process using TMAG40 ; 40 grit metal bond diamonds. Grind in an “east to west” then “north to south” pattern, or until a uniform scratch pattern is achieved. Thoroughly inspect the floor to ensure that the desired level of aggregate and floor flatness is achieved before moving on to the next steps. Squeegee or vacuum up dust residue from previous step. Repeat the same process using TMAG80 ; 80 grit metal bond diamonds.
*Note: Due to the unknown nature of the aggregate dispersion in a concrete floor, low exposure aggregate floors will often have an inconsistent end result. As this is usually a result of the concrete pour, it is out of the operators control and as such should be identified to the owner as soon as possible.
TRANSITIONAL
![]()
Using the quick change TMAG resin adaptors, fasten the transitional tooling to the grinder. Grind in an “east to west” then “north to south” pattern, or until a uniform scratch pattern is achieved. Thoroughly inspect that scratches from previous step have been removed before moving on to the next step.
iShine 100
![]()
Squeegee or vacuum up dust residue from previous step, proceed to polish with iSHINE100 Grit resin (BLACK). Polish in an “east to west” then “north to south” pattern, or until a uniform scratch pattern is achieved. Thoroughly inspect that scratches from previous step have been removed before moving on to the next step.
DENSIFIER
![]()
Squeegee or vacuum up dust residue from previous step. Ensure that the surface is clean and dry before completing the densification process. For a Sodium based densifier apply ArmorDefend Na. For a Lithium based densifier apply ArmorDefend Li. Refer to the chosen products data sheet for safety and application instructions.
iShine 200 – iShine 1500
![]()
After the densification process is complete, proceed with the remaining resin steps. Polish with iSHINE 200 Grit resin (BLUE). Polish in an “east to west” then “north to south” pattern, or until a uniform scratch pattern is achieved. Thoroughly inspect that scratches from previous step have been removed before moving on to the next step. Squeegee or vacuum up dust residue from the previous step if required. Repeat this process for iSHINE 400 grit (RED), iSHINE 800 grit (WHITE) & iSHINE 1500 grit (YELLOW).
HIGH GLOSS SEALER
![]()
Squeegee or vacuum up dust residue from previous step. Ensure that the surface is clean and dry before completing the ArmorFinish: Stain and wear protection. Refer to the product data sheet for safety and application instructions.
Again, we understand that not everyone is looking for the same finish, and we know different people are working within different time and budget constraints. That is why we have meticulously created the iShine Floor System with 4 different finish options. We want all of our customers to be able to benefit from a strategically thought out, and successful floor polishing system, regardless of their time or budget constraints.
Our goal for this blog is to explain the different processes in effort to show that achieving that beautiful, high quality, professional finish is totally doable without needing extensive technical knowledge.
If the iShine Floor System is something you think you might be interested in, or have any questions about, feel free to reach out, and one of our specialists would be happy to answer any further questions or concerns.